1. Register Products
Before users can purchase items in your game, you need to register your products on the Verse8 platform. This page guides you through the product registration process.
Accessing the VX Shop Dashboard
- Navigate to Verse8 platform
- Go to your game’s management page
- Click on the VX Shop tab
This is where you’ll manage all your game’s monetization products.
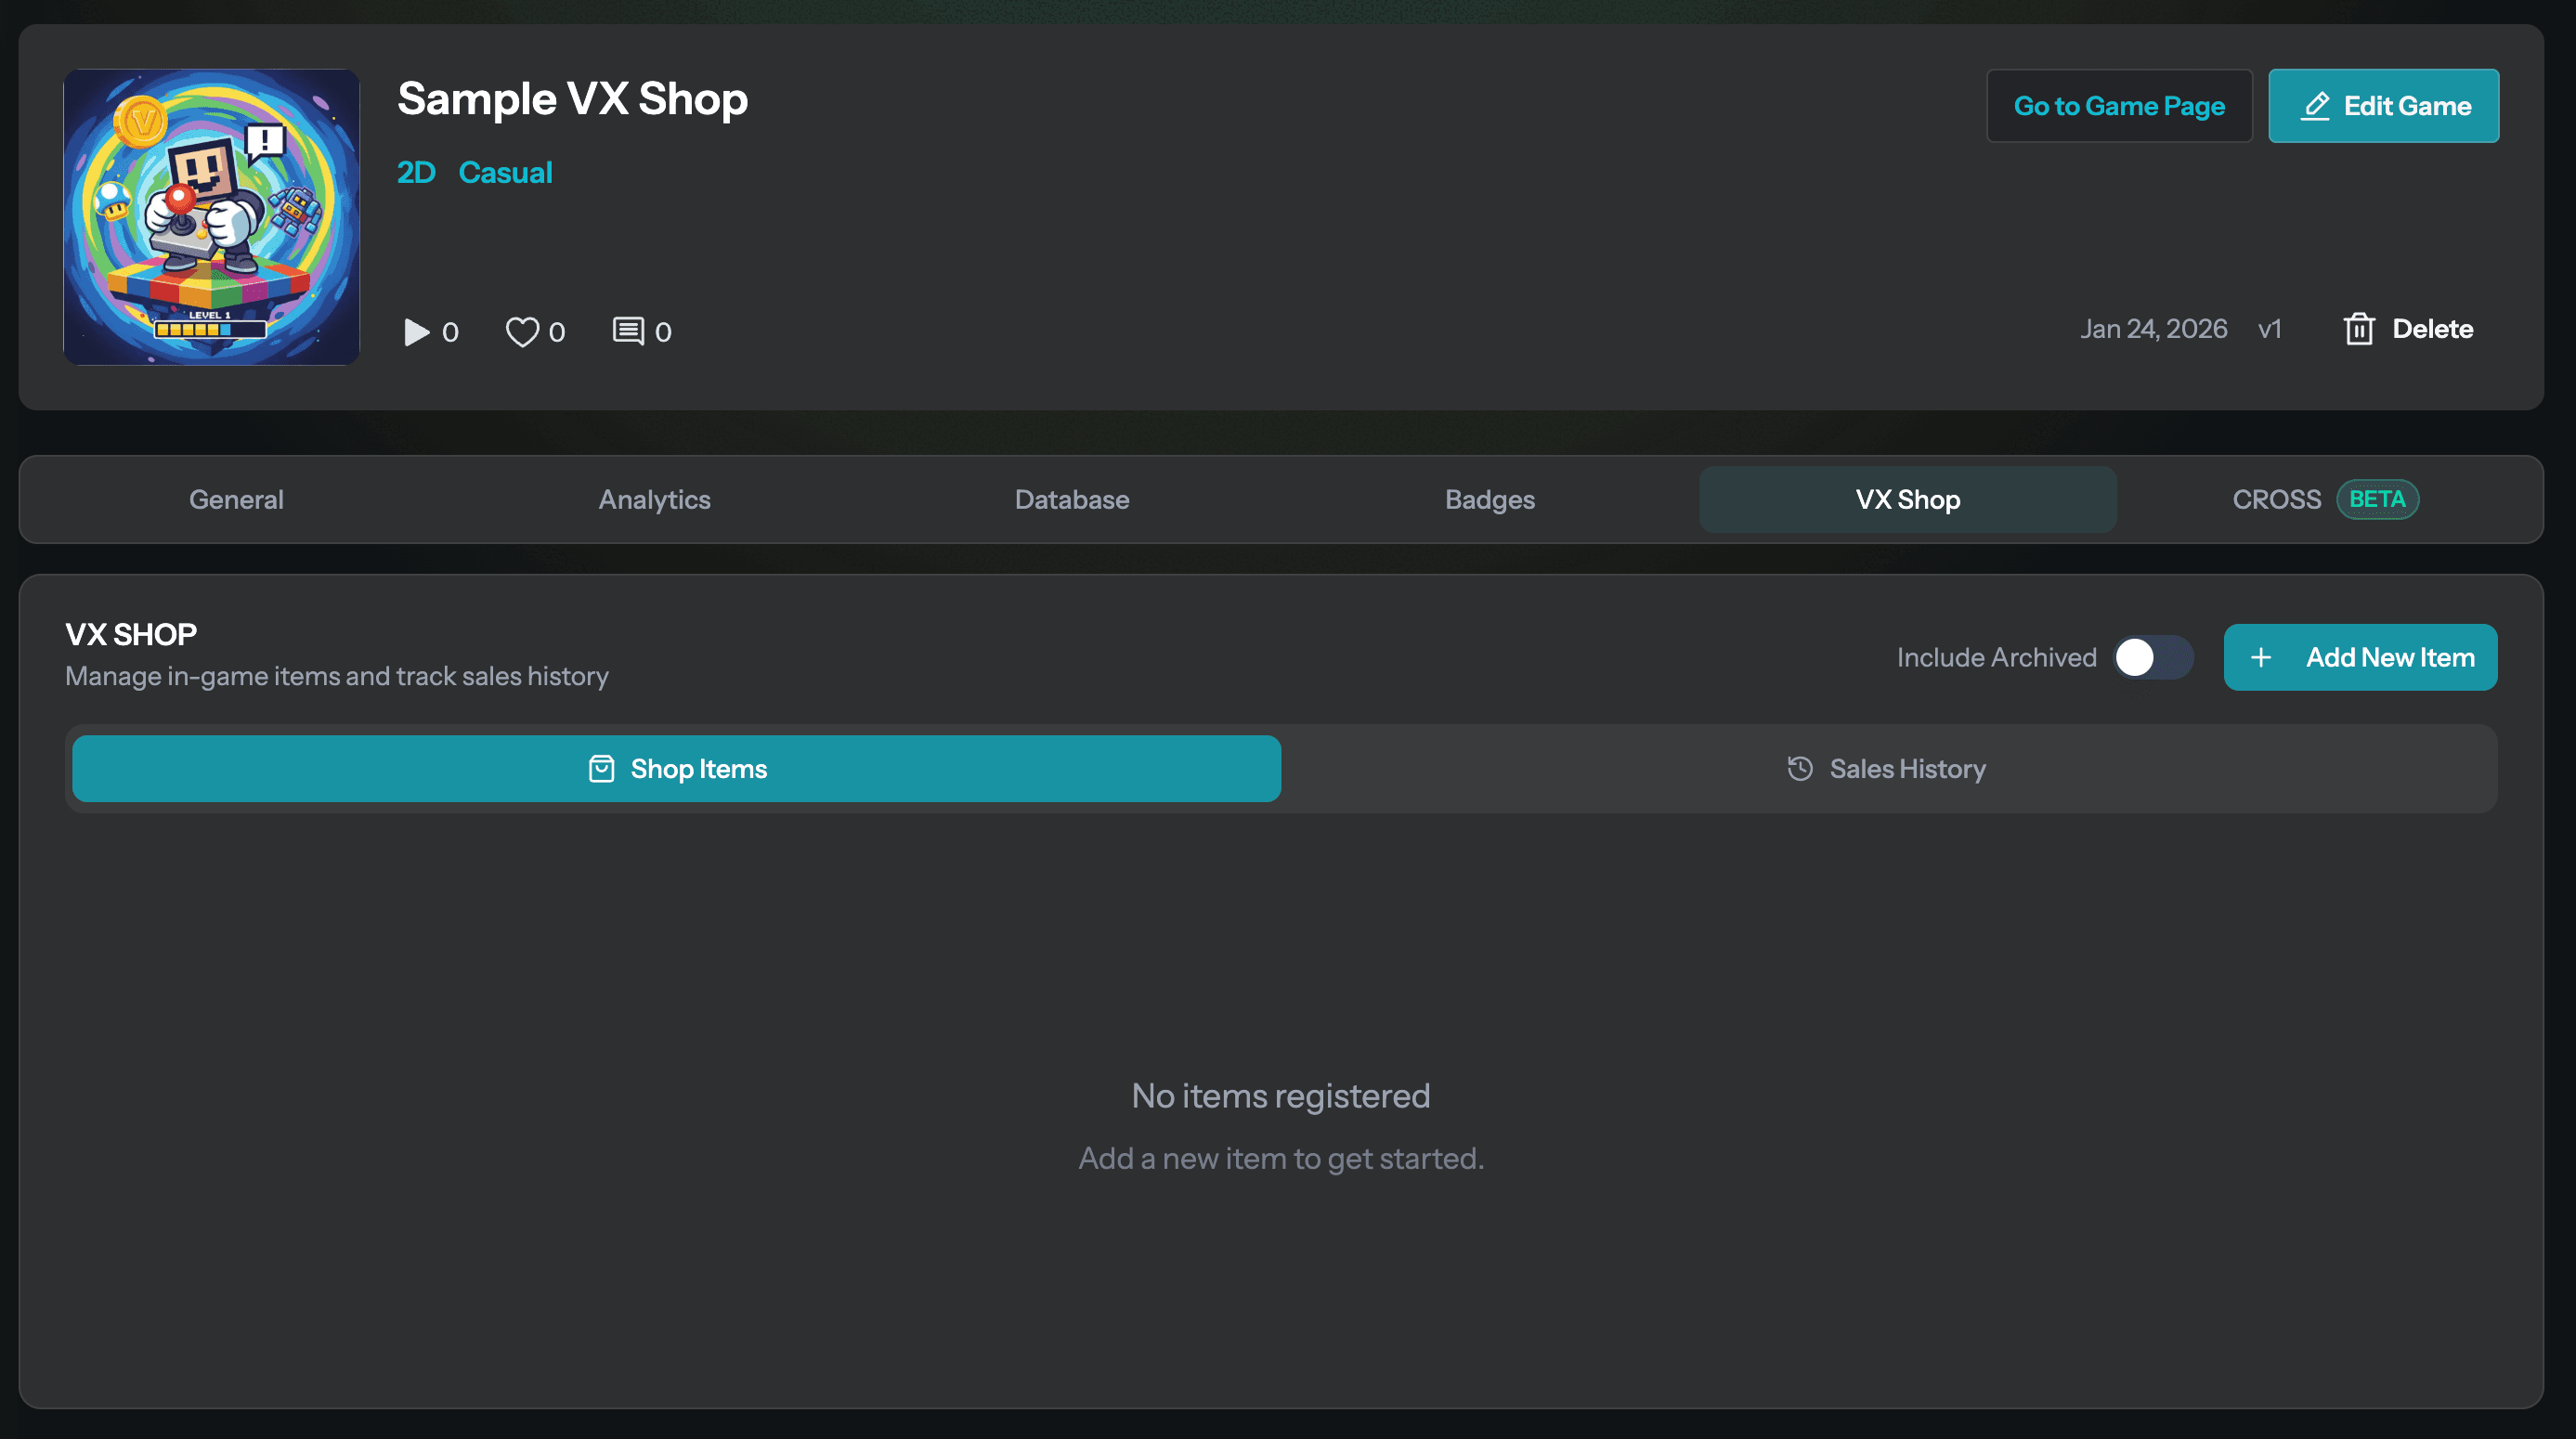
Adding a New Product
Click the “Add New Item” button to start registering a new product. You’ll need to fill out several fields to define your product.
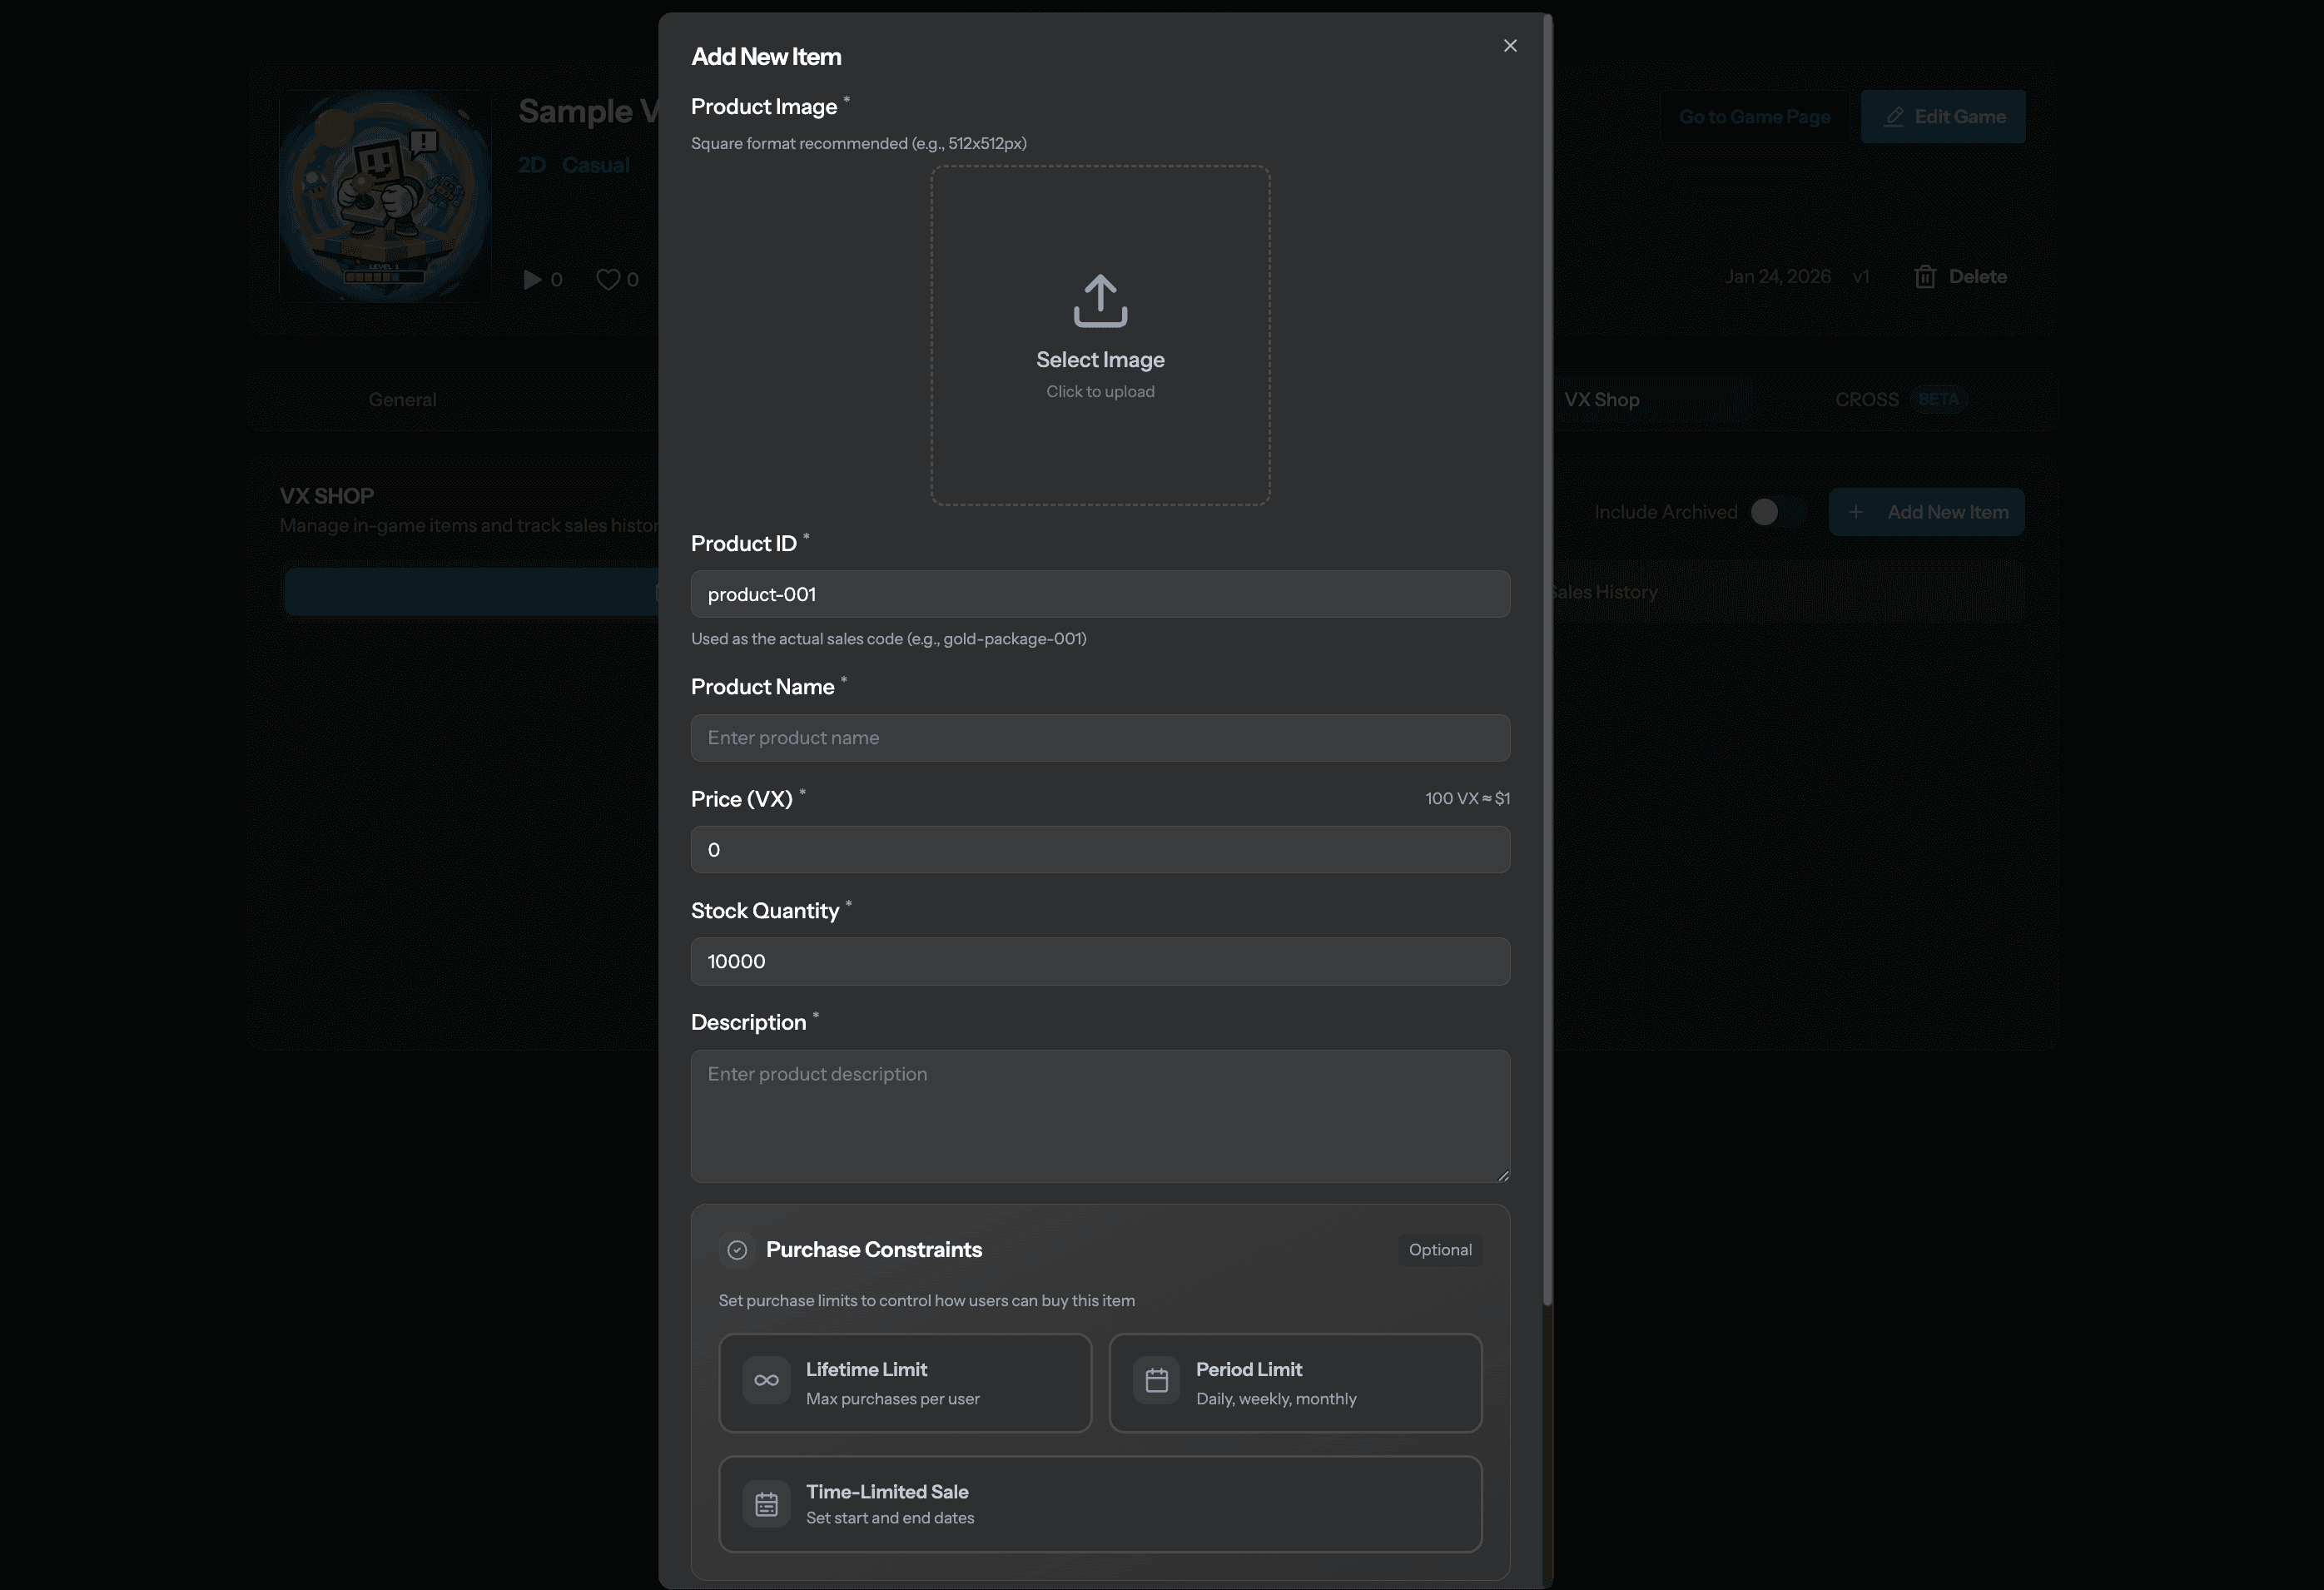
The product registration form includes the following fields:
Product Fields
- Product Image: Image displayed on the Verse8 purchase page (recommended: 512x512px)
- Product ID: Unique identifier used in your game code (e.g.,
gold_pack_1000,ad_removal) - Product Name: Display name shown to users (recommended in English)
- Price (VX): Price in VX currency (100 VX ≈ $1 USD)
- Stock Quantity: Total available inventory (set high number for unlimited)
- Description: Detailed explanation of what the product includes
- Purchase Constraints (Optional): Control purchase frequency and availability (see below)
- Metadata (Optional): Additional JSON data passed to your game server on purchase
Purchase Constraints
Purchase constraints allow you to control purchase frequency and availability. This section has two main categories:
Quantity Limits
Control how many times a user can purchase a product.
Lifetime Limit
- Purpose: Restrict total purchases per user across their entire lifetime
- Use Cases:
- One-time purchases: Ad removal, permanent upgrades
- Limited bundles: “Buy up to 3 times” event packages
- Examples:
- Ad Removal (Limit: 1)
- Starter Pack (Limit: 1)
- Special Event Bundle (Limit: 3)
Period Limit
- Purpose: Restrict purchases within a specific time period
- Available Periods: Daily, Weekly, Monthly
- Use Cases:
- Daily deals: “Purchase once per day”
- Weekly offers: “Limited to 2 per week”
- Monthly packs: “One per month”
- Examples:
- Daily Gold Bundle (1 per day)
- Weekly Premium Pass (1 per week)
- Monthly VIP Subscription (1 per month)
Combining Limits
You can combine both lifetime and period limits. For example:
- Lifetime Limit: 10
- Period Limit: 1 per day
This means users can buy the item once per day, up to 10 times total.
Time-Limited Sales
Control when a product is available for purchase.
Time-Limited Sale
- Purpose: Only allow purchases during a specific date range
- Use Cases:
- Holiday events
- Season-specific items
- Flash sales
- Limited-time promotions
- Configuration:
- Start Date & Time
- End Date & Time
Example Use Cases:
Holiday Pack
├─ Start: Dec 20, 2026 00:00 UTC
└─ End: Jan 5, 2027 23:59 UTC

Flash Sale
├─ Start: Feb 14, 2026 12:00 UTC
└─ End: Feb 14, 2026 18:00 UTC
Activating Your Product
Once you’ve filled out all the fields:
- Review all information carefully
- Toggle the “Active” switch to enable the product
- Save your changes
Product Registered!
Your product is now registered in the VXShop system and ready to be sold.
Previewing Your Product
After registering your product, you can preview the purchase dialog that users will see.
Simply click on the Product ID in the product list to open the actual purchase dialog.
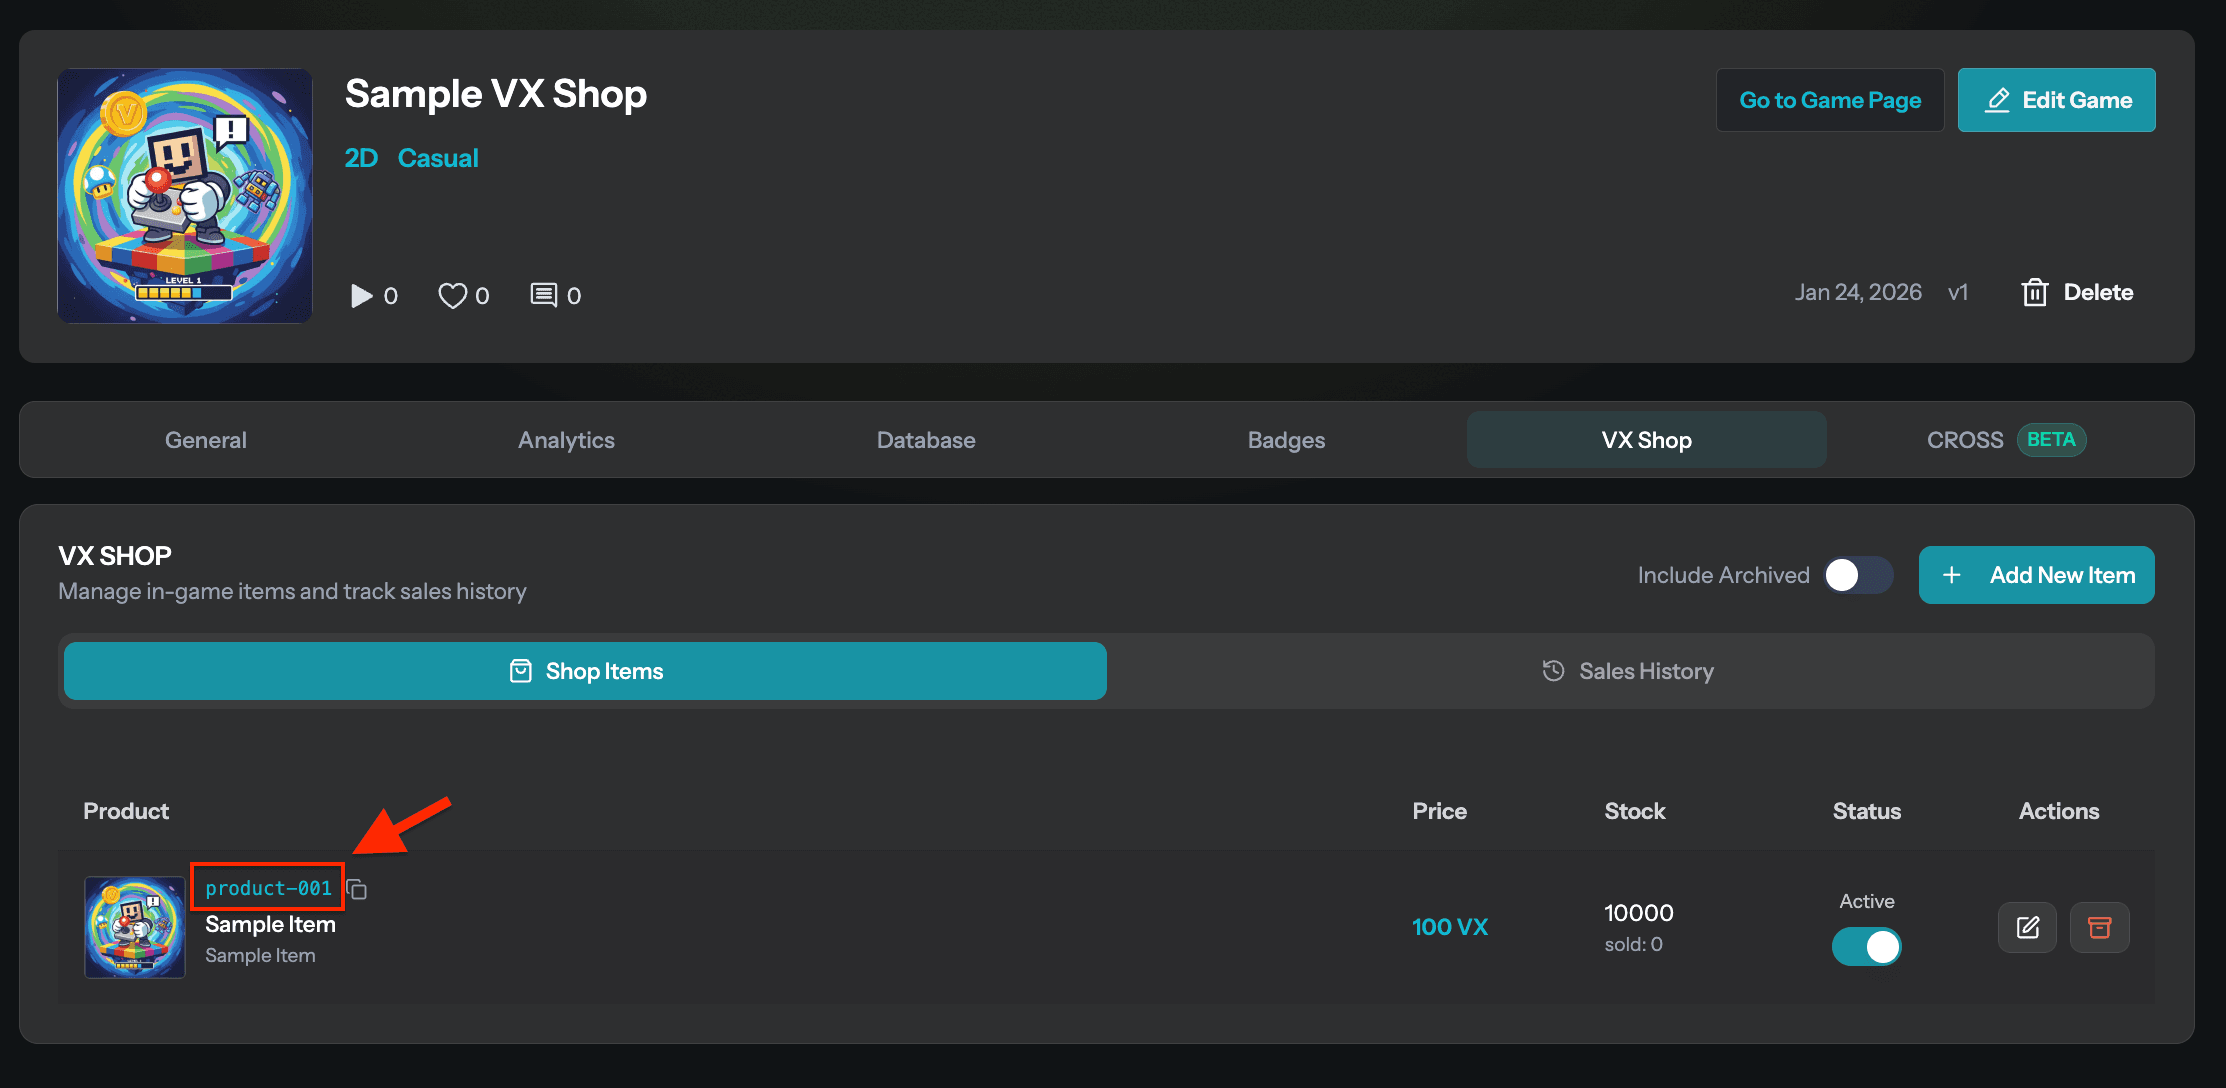
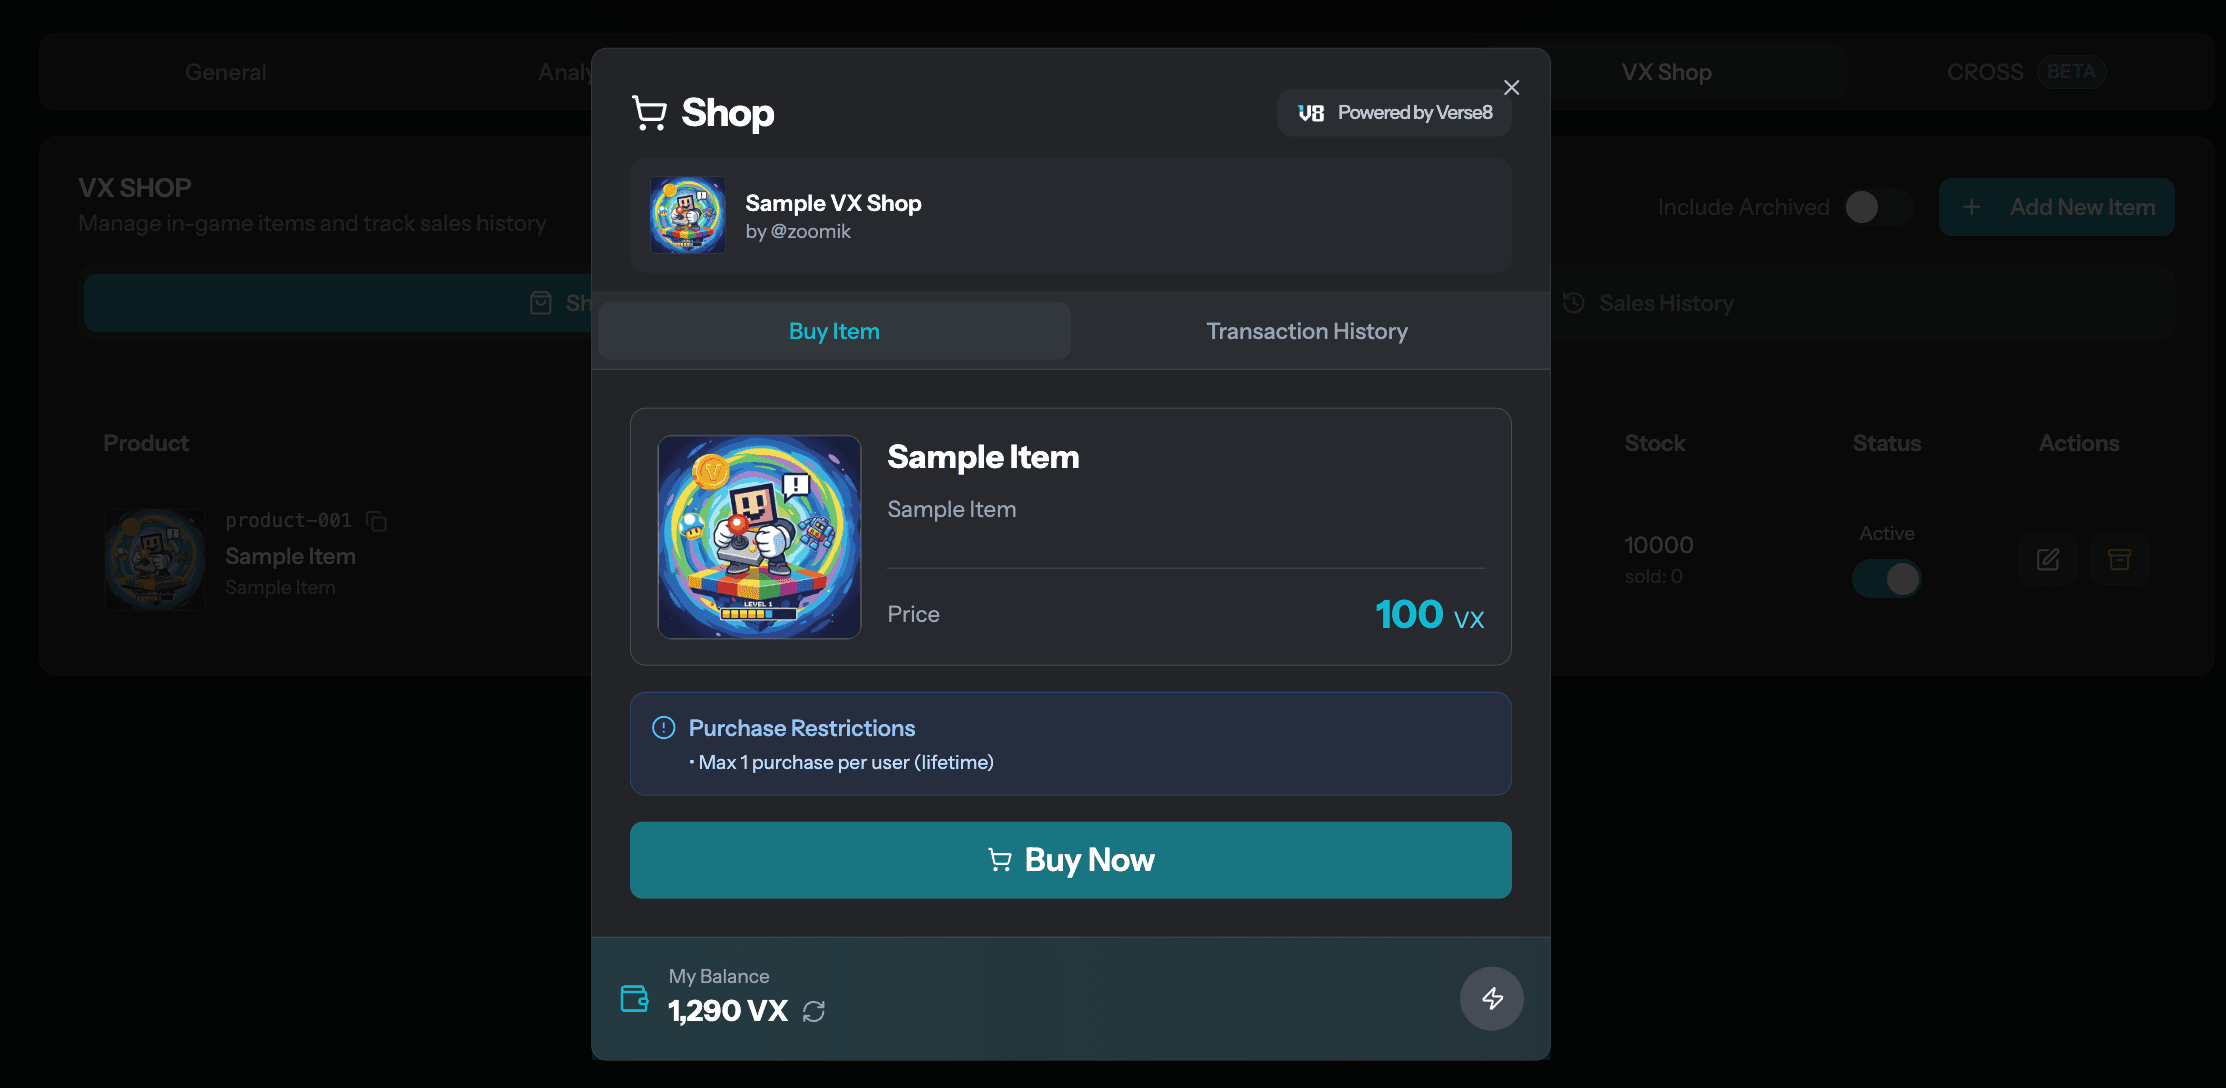
This allows you to verify that all product information displays correctly before users make purchases.
Important Notes
Registration ≠ Sales
Registering a product here does not automatically make it available in your game. You must implement the shop functionality in your game code to display and sell these products to users.
See the next section: Implementing In-Game Shop
Product Management Tips
- Test Products: Create test products with low prices during development
- Clear Naming: Use descriptive names and IDs
- Review Before Activation: Double-check all fields before enabling
- Monitor Performance: Track which products sell well
- Update Descriptions: Keep information accurate as your game evolves
Next Steps
Now that you’ve registered your products:
- ✅ Products are registered in Verse8
- ⏭️ Implement shop UI in your game
- ⏭️ Handle purchase events in your game server
- ⏭️ Test thoroughly before public launch
Continue to the next section to learn how to implement the in-game shop: